
KITCHEN UPDATE: FAUX SUBWAY TILE BACKSPLASH WITH VINYL PEEL AND STICK WALLPAPER
You guys, our kitchen got an update, and I couldn’t be happier with it! We decided to try out peel and stick wallpaper for the first time. We bought a roll of the Textured Vinyl Subway Tile Wallpaper from Target last week, and now that we’ve installed it, I can’t believe how real it looks!
I posted a pic to Instagram and also sent a video to family and friends, and they all thought it was the real deal. Because I got such an insane response from you all on Instagram about it, I decided I would break down how we did it, so you can do it yourself. I highly recommend it, especially if you live in a rental unit, and don’t want to put too much money into a space that you don’t own.


Fun fact, I used to work for an e-commerce decor company that sold designer wallpaper, but I had never applied any myself. I was a little nervous, but figured that if it didn’t work out, I would have only spent about $50 total for the wallpaper itself and everything needed to apply it. It was absolutely worth it! And it only took us about two and a half hours from start to finish. The perfect little weekend project!
Sadly, I wanted to show you all a time lapse video of the transformation, but my phone screwed up, and long story short, after hours of trying to recover the video, it’s gone. BUT I do have pictures, and lots of helpful step-by-step tips for installing, so read on to see how we did it. If you do end up trying it, let me know! I want to see photos. <3
WHAT WE USED:
- Textured Subway Tile Vinyl Peel & Stick Wallpaper
- Tape Measure
- Yardstick
- X-Acto knife (NOT scissors)
- Pencil
- Hard, flat surface to cut wallpaper on (I used a broken-down cardboard box)
- Windex (it needs to specifically be brand-name)
- Tempaper Squeegee or Window squeegee
- Screwdriver
- Another person for an extra set of hands
***A Note: Vinyl wallpaper is great for areas that see a lot of water/moisture or food, like bathrooms and kitchens, because it won’t deteriorate when it gets wet, and you can wipe it clean if something gets on it.***
How To Install Peel & Stick Faux Subway Tile Wallpaper
1. Measure The Area & Paint It (If Necessary)
The first thing we did when starting this project was measure the area we wanted to cover so we would know how much wallpaper we would need to buy. Keep in mind that the wallpaper’s print runs vertically, so factor that in when deciding how much to purchase.
After buying one roll (we had extra left, too), we then painted the backsplash, since peel and stick wallpaper recommends that you use it on eggshell, satin, semi-gloss, or high-gloss paint. Our apartment came pre-painted with matte paint, which is the only type of paint that isn’t recommended for this type of project.
It wasn’t much money–we bought a quart of white eggshell paint from Lowe’s for $15 and plan to use the rest of it to spruce up our bathroom later. We painted the area we planned to put the wallpaper on a week before applying to fully allow the paint to set.
***A Note: If you have a textured wall, I wouldn’t recommend using this wallpaper, as any texture will show through the paper.***
2. Cut The Wallpaper Panels
One of the most important parts of making sure everything goes smoothly with the project is measuring the wallpaper correctly and ensuring that each panel lines up with the pattern of the next one.
I laid out a flattened cardboard box to cut the wallpaper on and used a yardstick to measure the vertical length that I needed for a panel, adding a couple of extra inches (that I cut away after applying…more on that in a second), and made a small mark on the wallpaper where that was. I measured the same distance on the other side of the wallpaper panel and made another mark. I then took the yardstick, and lined it up with the two marks, held the yardstick down firmly, and cut along it using the X-Acto knife.
***A Note: Measuring and lining up the yardstick along the two marks on each side ensures that the line you cut is perfectly straight, and using the yardstick as a guide when cutting makes sure you don’t have any jagged edges.***
For each panel of paper that you cut after the first, you’ll need to line up that pattern with the one before, and then repeat the process of measuring and cutting on both the top and bottom of the wallpaper. You can see how I lined these up below.
After cutting each panel, I would write “1 Top,” “2 Top,” “3 Top,” and so forth on the top part of the wallpaper panels. That way I would know what order to install the panels, and not get them flipped around or upside down (also shown in the second photo below).


3. Remove Electrical Outlet Covers
We have two electrical outlets in the area we were wallpapering. Because you’ll need to cut a hole (later) for the electrical outlets, you’ll need to remove the covers on the outlets. That way the paper will lay flat as you position it, and you won’t have to be as precise with cutting the holes for the outlets since you’ll put the cover on top later (More on that process in step 5).
4. Spray The Wall With Windex
After measuring and cutting all of my panels, Rich and I went into the kitchen and very liberally sprayed the wall area where we would be applying the first panel of wallpaper with Windex. And when I say liberally, I mean A LOT.
In the reviews of this wallpaper, some people had trouble adjusting it after putting it on the wall. They also had issues with air bubbles. The Windex worked like a charm for eliminating this issue. It allowed us to pull the wallpaper off and reposition if necessary, and let us smooth out bubbles more easily.
5. Apply The Wallpaper Panels
When applying each panel, I lined up the top of the wallpaper with the top of our cabinets and held it there firmly while Rich used the window squeegee to smooth the paper down to the bottom.
While still holding the top of the panel, we used the X-Acto knife to cut away the excess wallpaper where the wall meets the countertop. After that, we spent several minutes using the squeegee to smooth out any air bubbles while still holding the top of the wallpaper steady.
It’s important that you do not pull or stretch the wallpaper because this warps it. Be gentle, but firm, and be patient as you work the bubbles out of each panel. Repeat this process (being sure to spray the area with Windex first) of lining up the panels with the pattern of the panel before each time.
Because our cabinets had slightly warped over the years, they weren’t perfectly straight, and we had to cut some excess millimeters off the top once we lined up the pattern. It wasn’t too much of an issue because we could use the cabinets as a guide when cutting with the X-Acto knife. You can do the same if your ceiling is slanted.
***How To Deal With Electrical Outlets:
By this point, you should already have your electrical outlet covers removed. We turned off the power at our fuse box, so there was no concern of getting electrocuted.
We then lined up the panel of wallpaper and pressed it down all the way to the outlet, and a little below. Then, using the X-Acto knife, we cut an “X” where the outlet is. Then we cut away each little triangle made from the “X”, which formed a square just big enough to expose the outlet and allow the paper to sit flush to the wall. I found this video particularly helpful.***
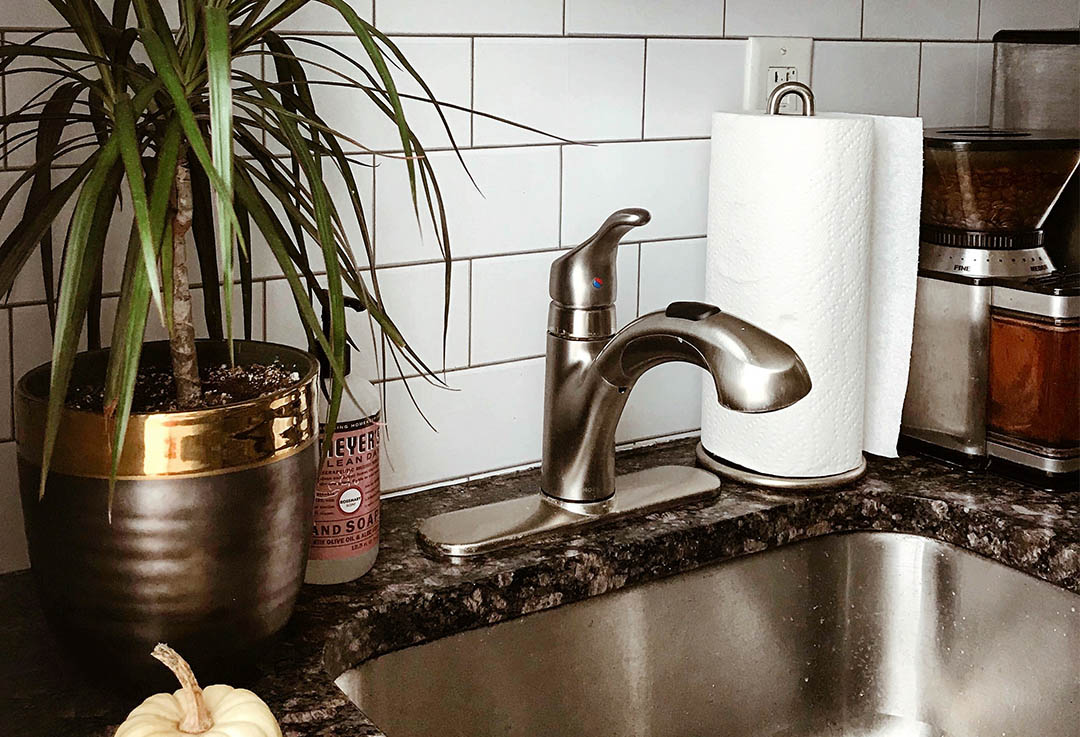
6. Brag About Your New Subway Tile Wall & Fool People Into Thinking Your Kitchen Update Was Super Expensive
I don’t think I need to elaborate here.
WHAT WE USED:

LEAVE A COMMENT